How to Build a Shallow Well
Starting your own vegetable garden? Good for you! Being able to grow your own fruits and vegetables is a wonderful thing. There's just one small problem though -- how will you water it? Water, especially "extra" water for lawns and gardens, can be very expensive to purchase through your utility company, and it's also at times regulated and limited as to how much you can use. There is a way around this though if you're DIY homeowner in the city or the country, and that's by getting your irrigation water the old fashioned way: digging your own well. Sound complicated? It's really not -- just follow these three steps and you'll be watering your vegetable garden in a eco-friendly and free way in less than one day's labor.What to Do Before You Dig a Well
First of all, call 811 a few days prior to digging to find out where all your utility lines are. Next, research your local codes, rules and regulations as they relate to a driven shallow well. Even if you do not find any laws that are required for you to follow, or permits to pull, it's wise to research and find out other information before you dig, such as what the appropriate setback distance is from your home, as well as what certain sanitary hazards setbacks may be, such as septic waste tanks (usually at least 50 feet is recommended).
Another good thing to research is the approximate depth of your water table. For some areas this can be as little as 12 to 15 feet. You'll still be going another few feet (perhaps as much as ten), as this depth is just where you will first hit water. You'll need to be sure the entire well point is fully submerged; this can be anywhere from 3-10 feet past the water table depth.
*Our materials and tools list is prepared for driving a shallow well (meaning 25 feet or less in depth).
Step 1: Dig
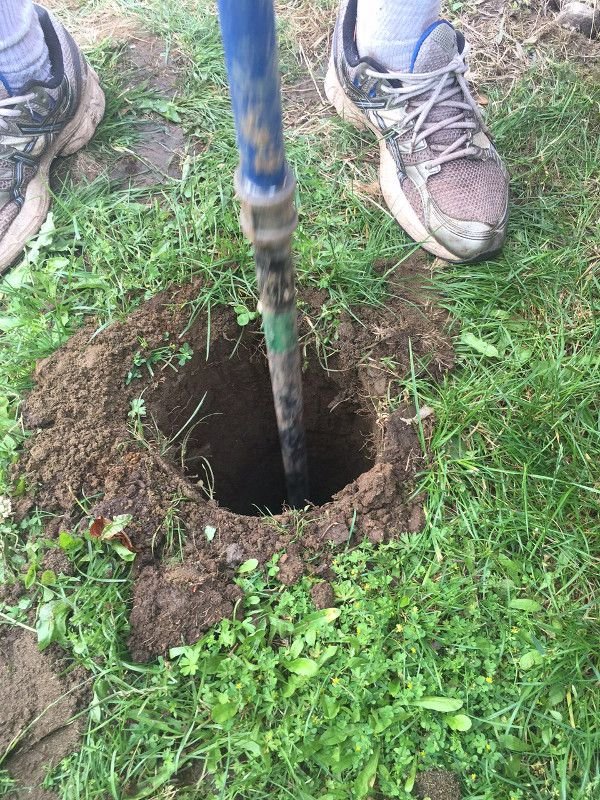
Using your auger or post hole digger, begin digging wherever you'll be placing your shallow ground well. Once you get down far enough that your handle is just a few inches above ground and you can't use it any more, add your first 5-foot extension of black pipe. You'll be adding the next section (and so on and so forth), until you can dig no further with it. When you've reached very wet soil or sand or whatever it may be (basically, it's mud), you're done digging. It won't do any good to continue as you'll just keep collapsing the hole.
Step 2: Drive
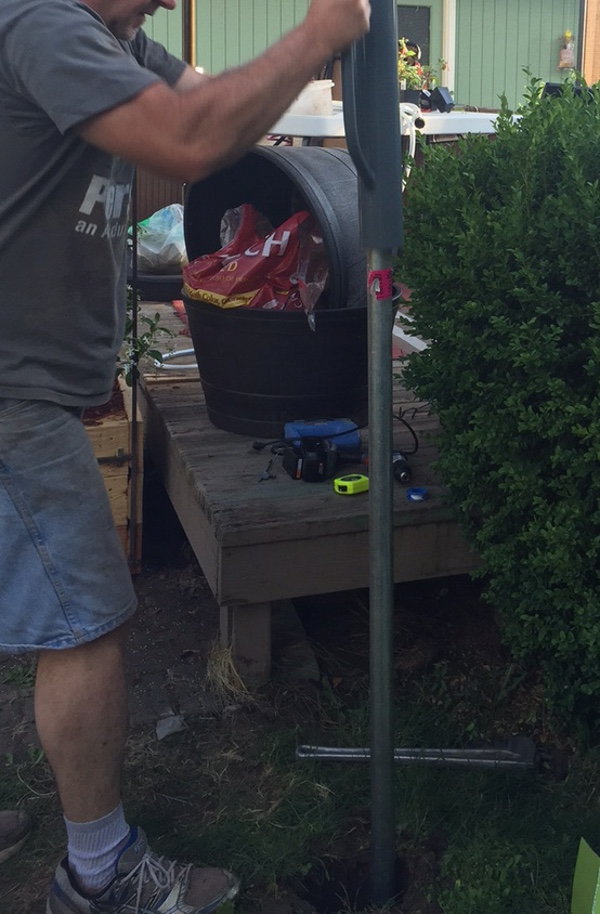
It's now time for the most physically difficult part of adding your driven shallow well: the driving part. Before you begin, measure your depth by seeing how much pipe you had to add to your digging tool. Depending on where you live, this can be anywhere from 2 feet to 20 feet.
Now that you have an approximate depth, take your well point and screw it on with a pipe wrench to your first 5 feet of galvanized steel pipe. Continue adding (depending on how far you were able to dig down) each 5-foot section. Make sure to use the teflon tape on each section as you add it.
Ready to pound something? Good, it's time to ram that pipe into the ground. Screw on your driving cap, prepare your muscles for some burn, and start hammering away by placing your post hole driver over the top of your pipe. This is going to be a long process, and for some it will be very difficult depending on what type of ground you have beneath you. As you go deeper you'll be adding more pipe and may at some time need a small, but very sturdy, ladder to reach the top.
When do you stop pounding? The only way you'll know for sure if you're truly deep enough is to stop every so often (usually when you know you're at least three feet past your local water table estimate), remove your driving cap and drop in your weighted string (string with washer attached). Once you pull it back up, measure how much of the string is wet. If you have more than three feet of wet string you can give your pump a try, but it's best to try to go a bit further if you can. As much as ten feet below the water table is more ideal as you'll ensure that the well point screens are completely submerged and you'll get a better flow from your pump.
Once you've determined you are down far enough, drop your garden hose in the pipe, turn it on and flush out the well point before you attach your pump.
Step 3: Pump
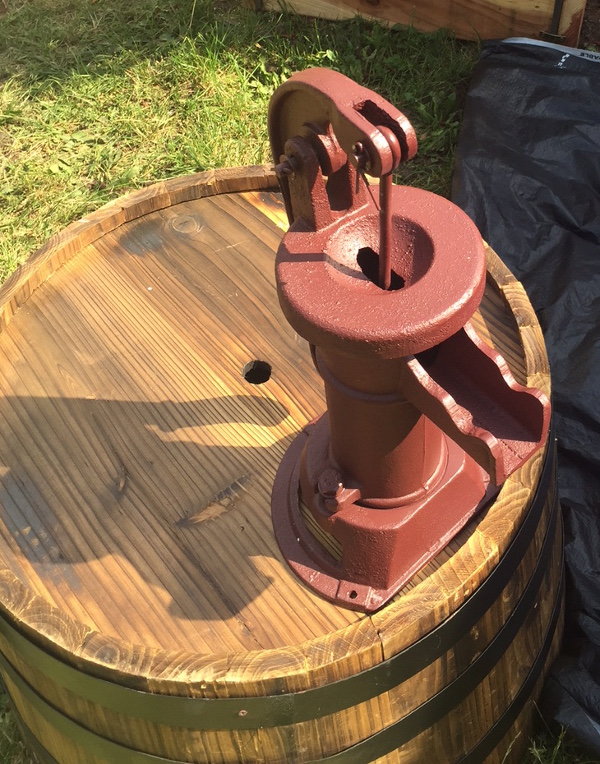
This is the fun part -- actually getting that water up out of the ground and into your garden. To do this you're going to connect your hand pump. You want to be sure there's enough pipe sticking up to attach the pump to, but not enough pipe that it's standing so far above the ground that it'll be difficult to use. Once you have your height right (either add pipe or drive it down further) it's time to add your check valve. This will prevent the water from going back down the well and will help the pump keep its prime.
Next, attach your hand pump. Follow the directions that comes with it, but it's rather straight forward and involves just adding it onto the pipe. Prime your pump (follow manufacturer directions), and begin manually pumping some water from your well. It will be muddy for at least the first few pumps, but keep going until you get to clear water. Voila! You now have free water and can start watering your garden.
Final Tips and Points
If you are not thrilled about bucketing water to your garden, you may want to add a shallow well electric pump. This way you can water your garden using timers, sprinklers and soaker hoses just as you would have using the water coming into your home from your utility company. An electric pump is not that difficult to add -- just be sure to get one that is specifically for shallow wells (jet pump), is self priming, pressure regulated, and has a small tank attached.

Lastly, if you're considering drinking or cooking with this water from your shallow well you want to test it. And, if you have high arsenic levels in your region, you may also want to test it even if you're only watering your vegetables with it as you will still ingest it. You can then filter it if needed.
With water becoming scarcer in many areas, and therefore more expensive as a commodity, a shallow well full of free water is certainly an attractive DIY option for any homeowner. Just be sure to follow any local rules and regulations and stay 25 feet or less in depth, and you'll be on your way to being a happy well owner whether you live in the city or the country.
http://doityourself.feedsportal.com/c/35026/f/647105/s/48307ed4/sc/31/l/0L0Sdoityourself0N0Cstry0Chow0Eto0Ebuild0Ea0Eshallow0Ewell/story01.htm